Pages

Wednesday, 27 July 2016

The new MUST HAVE crafting item; the amazing DCWV Projcet Stacks

The Creative Expressions office is a buzz with the arrival of some amazing new products from DCWV; Project Stacks. These project books are fabulous for any level of crafter. They contain eveything you need to make the projects plus full instructions. Available now from your favourite craft retailers or on HOCHANDA TV on a One Day Special with Sarah Hurley, starting this Friday 29th of July at 8pm and going live on Saturday at 9am/12pm/4pm and 7pm. We know they will be massively popular - we all have them on our wish lists..now how to explain how ESSENTIAL it is to own one or two...

Keep scrolling for the product pictures, plus what our Design Team member Lisa Horton has been crafting, what Sarah Hurley has made for the HOCHANDA show and what Tracey, our in-house Crafter has whipped up...


Haven't they done an amazing job on these flowers - posies or wreaths to brighten up any space and easy to put together - decorate anything you like to give it a 3D effect or pop them in a vase - just don't water them!


Below we can see just how effective the Cone Wreath Project Stack is. Lisa Horton made the Christmas Wreath and Sarah Hurley has gone for a bit more of a summery feel. This pack contains some really beautiful papers with different patterns, textures and finishes. 


Tracey has been using more of the Project Stacks to create a whole variety of beautiful items from bunting, to cards, to MDF flower wreaths made in very popular neutral tones. See.. we told you..amazing!

 Photo Credit: Traci Mclean

Alcohol Ink Masterclass with Julia Watts 3rd August 2016

Alcohol Ink Masterclass with Julia Watts 3rd August 2016

In this full day workshop you will learn many different techniques on how to use Alcohol Inks to create stunning backgrounds. Working on 3 projects throughout the day you will use various other Dies and products such as Creative Expressions Craft Dies by Sue Wilson Swiss or Belgium Collection, Shadow Box Dies, and your choice of Mini Striplet.

This is only a small
 class and its a great way to meet other like minded crafters and get some expert guidance from your tutor.

The Masterclass will run on Wednesday 3rd August 10am till 4pm and cost per person is £50.
To book call Tracey on 01536 481 778. We only have a few spaces left for this workshop so book now to avoid disappointment.


DIY Fabric Paint Shopping Bag with Stencils

Designed by Design Team member Lynn Brown


Our design team have been tasked this month with creating something using the new Cosmic Shimmer Fabric Paints. Lynn has used her paints to create this sweet country field tote bag, and she has also used a stencil to create this border pattern.


Shopping list:


Step 1. So that the paint does not transfer through to the other side of the bag, insert a piece of card into the bag.


Step 2. Take the fabric paint and a brush. You may find it easier to put a little of the paint into a pallet or onto a tile.


Step 3. Using a border stencil paint the fabric paint through the stencil onto the bag.  Reposition and align the pattern of the stencil to take it across the whole width of the bag.


Step 4. You will then have the border on your bag.


Step 5. Take the gold paint and put onto a glass mat or tile to use with the stamps.


Step 6. Use the paint on the mat like a stamp bad to cover the stamp with fabric paint.


Step 7. Stamp onto the fabric and then repeat over the top with an archival ink in green.


Step 8. Continue to build the border using the same technique with different stamps. Also take one of the stamps and use just the edges to form a bottom border.


Step 9. Press with a cover like a tea towel the finished bag to set the paints.


Other places to find Lynn:


Saturday, 23 July 2016

DIY Painted Floral Shopping Tote Bag

Designed by Design Team member Claire Newcombe


Our design team have been tasked this month with creating something using the new Cosmic Shimmer Fabric Paints. Claire has used it to decorate a shopping tote bag.

Shopping list:


Step 1. Prepare the tote bag for painting by ironing, and inserting a layer of cardboard to separate the two sides.


Step 2. Onto a palette/acrylic block, mix up 3 shades of green using Golden Lime and Sea Green lustre paints.


Step 3. Take one of the fuller grass like stamps onto an acrylic block, and ink up using the paint. Stamp multiple times using a combination of the three shades.


Step 4. Introduce a second stamp with a very different shape, and continue stamping with the green shades. Keep a good balance of the colours and shapes across the canvas. Consider keeping the lighter colours in the background, and the darker colour to the fore to create the illusion of dimension.


Step 5. With Sea Green paint select a third stamp (again with very different features) and begin stamping in the foreground of the composition. Using Golden Lime lustre paint, and a ‘grass like’ stamp, begin creating the canopy of a tree.


Step 6. Introduce floral stamps and colour. Use Moroccan Rose lustre paint and a wildflower stamp to add just one or two images.


Step 7. Using Summer Sunrise Lustre paint, stamp the single flower stem over the lighter green images. The paint dries very fast, so it is fine to stamp over images already on the material.


Step 8. Add extra colour that will tone in well, mix the lustre paints to create a new colour. To create a lilac, mix together Moroccan Rose and Atlantic Blue. Taking the stamp to this paint continue adding more floral elements to suit.


Step 9 To link the tree canopy and meadow below, paint some birds free hand using Summer Sunrise paint between the two areas.


Step 10. Remember to place stamps in warm soapy water after stamping to allow the paint to wash off without problem.


Step 11. When all the colours have completely dried, take the Silver Shine Sparkle fabric paint, and randomly paint a single flower head across the whole picture.


Step 12. As the sparkle paint dries the mica pieces really come to the fore and transforms the flower meadow into a magical fairy glen.

Other places to find Claire:


Wednesday, 20 July 2016

How to make a bright summery card using Fabric Paints

By Design Team Member- Sharon Curtis


Our design team have been tasked this month with creating something using the new Cosmic Shimmer Fabric Paints. Sharon has used it to create this colourful card. 

Shopping list:
  • Summer Meadow Stamp Set CEC780
  • JustRite Stacking Sentiments Stamp Set CR-02166
  • Cosmic Shimmer Lustre Fabric Paint Morrocan Rose CSFLPROSE & Sea Green CSFLPSEA
  • Cosmic Shimmer Sparkle Fabirc Paint Sunlight Gold CSFSPSUNGOL
  • Vellum 40024
  • Cosmic Shimmer Bright Gold Embossing Powder CSEPBRGOLD
  • Versamark Ink Pad
  • Black and White Chevron Paper


Step 1. Place the larger flower stamp on an acrylic block and use your finger to cover it with some of the Moroccan Rose paint.


Step 2. Stamp onto a piece of watercolour card.


Step 3. Stamp repeatedly to cover the card.


Step 4. Place the smaller flower stamp on your acrylic block and repeat the process, filling in the gaps using the Sea Green paint.


Step 5. Mix some of the Sunlight Gold Sparkle paint on an acrylic block with some water.


Step 6. Hold the brush above the stamped piece and hit it against the back of your hand to create paint splatters.


Step 7. Stamp the greeting onto a piece of vellum with Versamark ink, and heat emboss with gold embossing powder.  Cut into a strip.


Step 8. Wrap the vellum strip around the card piece and add some double sided tape to the back to attach it (you can also add a few dots of Cosmic Shimmer Glue behind the stamped area).

Other places to find Sharon:
BLOG
Facebook
Twitter
Pinterest
Instagram 
YouTube


Try it Tuesday 26th July- Treat Cups

For our next Try It Tuesday, at Creative Expressions HQ, we are running a small class on how to use the Creative Expressions Treat cups. These can be used in a variety of ways on cards to create seasonal snow globes or create shaker cards. Make sure to pop by and get some inspiration for your Christmas Cards. 

Product will only be demonstrated between the hours of 9.30am-12.30pm

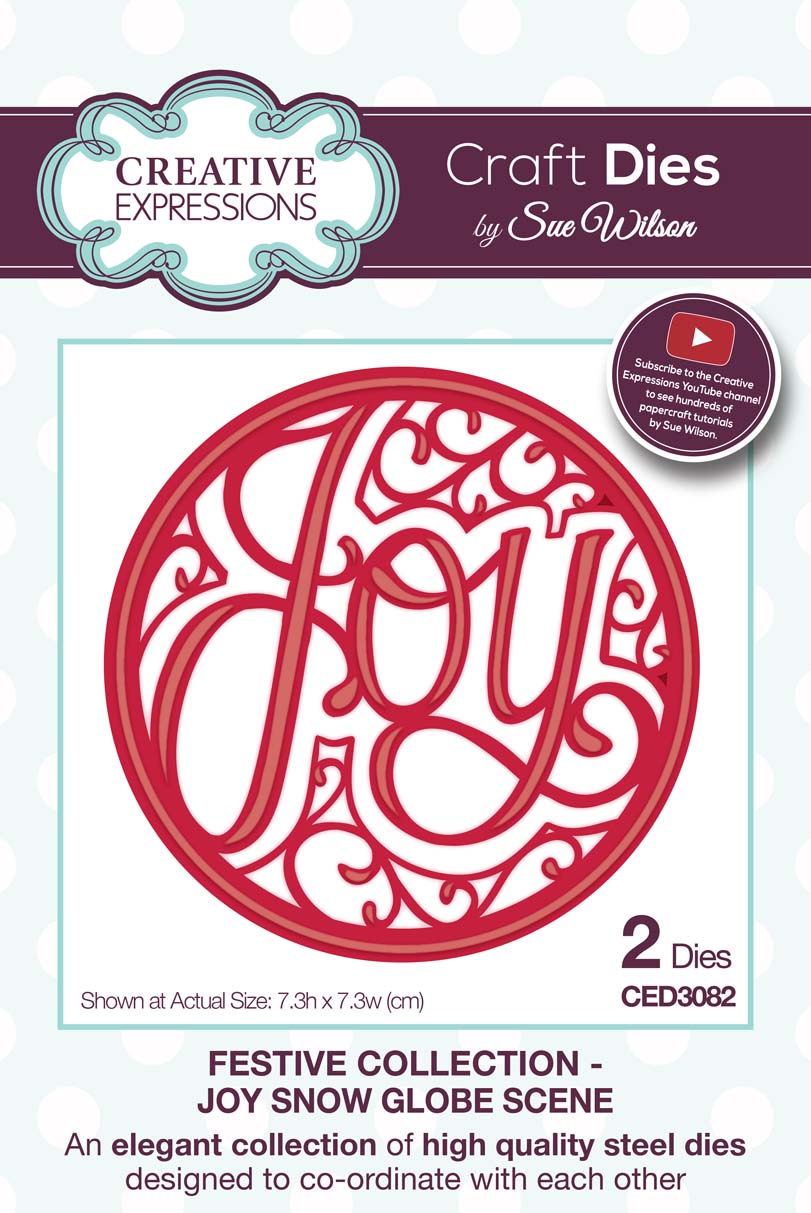
These treat cups are a perfect fit for the recent Festive Collection we launched a few weeks back. Especially the Creative Expressions Craft Dies by Sue Wilson. CED3079/CED3081/CED3082/CED3080


Not to mention one of our recent products, Micro Beads in a variety of colours. MICROWHITE/MICROBLACK/MICROCOPPER/MICROSILVER/MICROGOLD

Our shop hours are 9.30am - 4.30pm, so pop in and ask our Team any product questions and get your hands on the latest products.

The Creative Expressions Factory Shop can be found at:
Unit 2a Vernon Court, Henson Way, Telford Way Industrial Estate, Kettering, Northants, NN16 8PX.

(Open 9am to 5pm - Monday to Friday)
Tel: 01536 481778

Friday, 1 July 2016

July Workshops

New Workshop Date Added!
Cosmic Shimmer Pixie Powder Masterclass with Julia Watts 13th & 27th July 2016

Due to popular demand of our earlier Pixie Powder masterclass with Julia Watts, we have added a new date if you've caught the Pixie Powder bug and would like to learn more about this amazing new Cosmic Shimmer product?

Julia Watts recently demonstrated Pixie Powders on a One Day Special on Hochanda and it sold out so quickly that Julia was unable to share her full library of techniques with these fabulous powders. So, Julia has agreed to run a Cosmic Shimmer Pixie Powder Masterclass here at Creative Expressions,  where she will be inspiring you with lots of ways to get the most out of the powders.

The emphasis for this Masterclass are the techniques, so although you may not actually complete a finished project, Julia will show you inspirational ideas for all your future crafting with her expert tips, tricks and know-how.

The Masterclass will run on Wednesday 13th & 27th July. 10am till 4pm and cost per person is £50.
To book click, the button below or call Traci on 01536 481 778. We only have a few spaces left for this workshop so book now to avoid disappointment.

psst! we have 1 space left for the 13th July, be quick before it goes.